Valentine’s Day is the perfect time to show your love in a creative and heartfelt way. If you’re looking for a card design that’s both rustic and romantic, a lumberjack-inspired Valentine’s card is the way to go! Featuring plaid patterns, woodsy motifs, and charming illustrations, this theme brings a warm and cozy vibe to your Valentine’s greetings. Here’s a step-by-step guide to coloring your lumberjack-inspired Valentine’s Day card, using the Lumberjack stamp and die set. We’ve also incorporated parameters from Craft Roulette: Project: slimline, Colors: lumberjack, Element: hat or cap, Random: lace or doily.

1. Choose the Right Color Palette
For a lumberjack-inspired card, stick to earthy tones and warm, rustic colors. Here are some key shades to include:
- Deep Reds: Think bold, romantic shades like cherry or cranberry—perfect for plaid patterns and hearts.
- Forest Greens: Use these for tree motifs or background accents to add a natural touch.
- Rich Browns: Perfect for wood textures, logs, and earthy details.
- Charcoal Grays: Great for axes, tools, or outlining elements.
- Ivory or Beige: For a subtle contrast or to mimic the look of parchment.
2. Create a Slimline Design
Using the slimline card format, you’ll have plenty of space to showcase your design. This elongated card style is perfect for incorporating multiple elements like:
- Vertical Plaid Backgrounds: A slimline card offers the space to highlight a bold red-and-black plaid pattern.
- Central Motif: Feature your Lumberjack stamp, such as a bearded figure or a charming woodland scene, as the focal point.
Pro Tip: To keep the design cohesive, divide the card into three horizontal sections and balance your elements across them.
3. Incorporate the Hat or Cap Element
With the lumberjack theme, hats or caps are an essential feature. Use your stamp and die set to create a:
- Knitted Beanie: Color it in red or forest green, adding texture with fine lines to mimic the knit pattern.
- Flannel Hat: Match it to the plaid background for a coordinated look. Add shading for dimension.
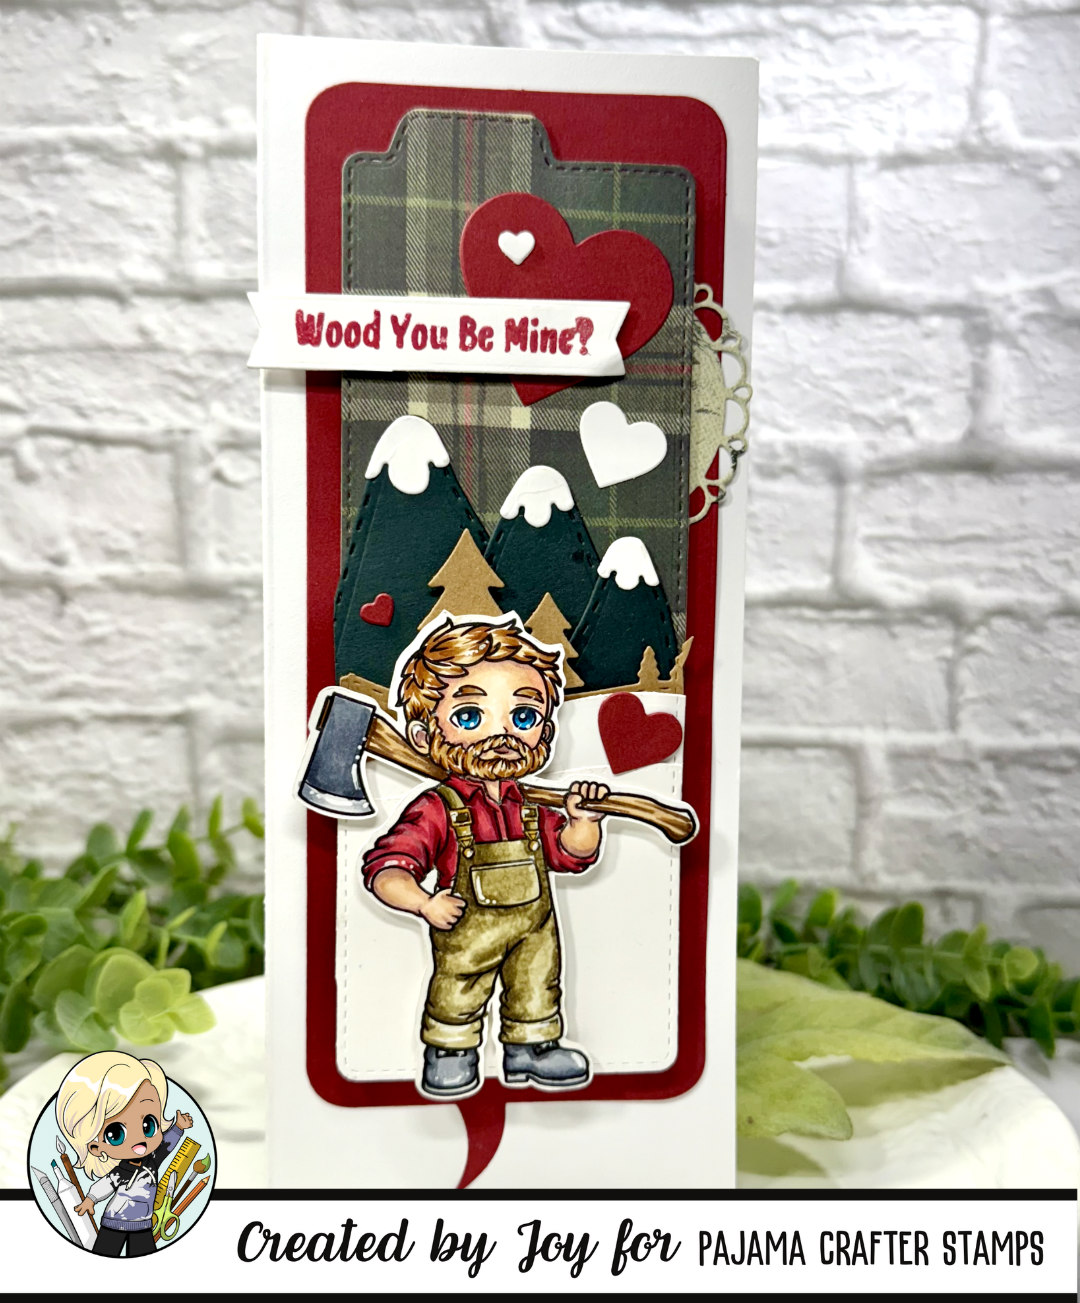
- Snow Caps: Using snow caps on the mountains served the purpose of meeting Craft Roulette’s requirement.
Position the hat or cap on your main character, or feature it as a standalone element in the design.
4. Add Lace or Doily Accents
To balance the rugged lumberjack aesthetic with a touch of romance, incorporate lace or doily elements:
- Use a die-cut lace border to frame your slimline card.
- Layer a paper doily such Scalloped Circle Die behind your central motif for a soft, romantic effect.
- Highlight the lace details with a subtle ivory or white to keep the look cohesive.
5. Bring the Woodland Details to Life
Lumberjack-themed cards often include nature-inspired elements like:
- Trees: Use gradient shading to add depth to evergreen trees. Start with a dark green base and lighten the tips with a yellow-green shade.
- Axes: For the blade, use metallic grays with a hint of blue for shine. Color the handle in a warm brown to mimic woodgrain.
- Logs or Wood Slices: Create a realistic wood texture by drawing rings in varying shades of brown, and add subtle highlights to the edges.
6. Add Romantic Touches
Even with a rugged theme, it’s still a Valentine’s Day card! Balance the rustic vibe with romantic elements like:
- Hearts: Incorporate hearts in unexpected places, like inside the plaid or as accents around the main design.
- Sweet Messages: Use a deep red or pink for lettering to make your message stand out.
- Florals: Add small, delicate flowers around the edges for a soft touch. Use pinks and whites to keep them subtle.
7. Finish with Personal Details
A handmade card becomes even more special with a personal touch. Consider adding:
- Your Valentine’s Name: Write their name in bold, rustic-style lettering.
- A Punny Message: Try something fun like “Wood You Be Mine” or Rock Your AXE Off”
- Glitter or Metallic Accents: Use gold or white pens to add a bit of sparkle—just enough to catch the light without overpowering the design.
8. Seal the Deal
Once your card is complete, give it a quick once-over to ensure all details are vibrant and polished. If you’ve used markers or paint, let everything dry completely before folding or adding embellishments.
Place your card in a kraft paper envelope for a final rustic touch, and tie it with twine or add a sprig of greenery for an extra

Thanks for dropping by and I hope you’re inspired today!