Hello! I’d like to start this off by saying that if I listed every single step I took when creating this card you’d be here reading for a loooong time. 😂 I changed my mind a few times, scored incorrectly, and even stamped too close to the edge once. Lots of re-dos. Its ok though, crafting is a learning experience and you only learn if you try something new, right?

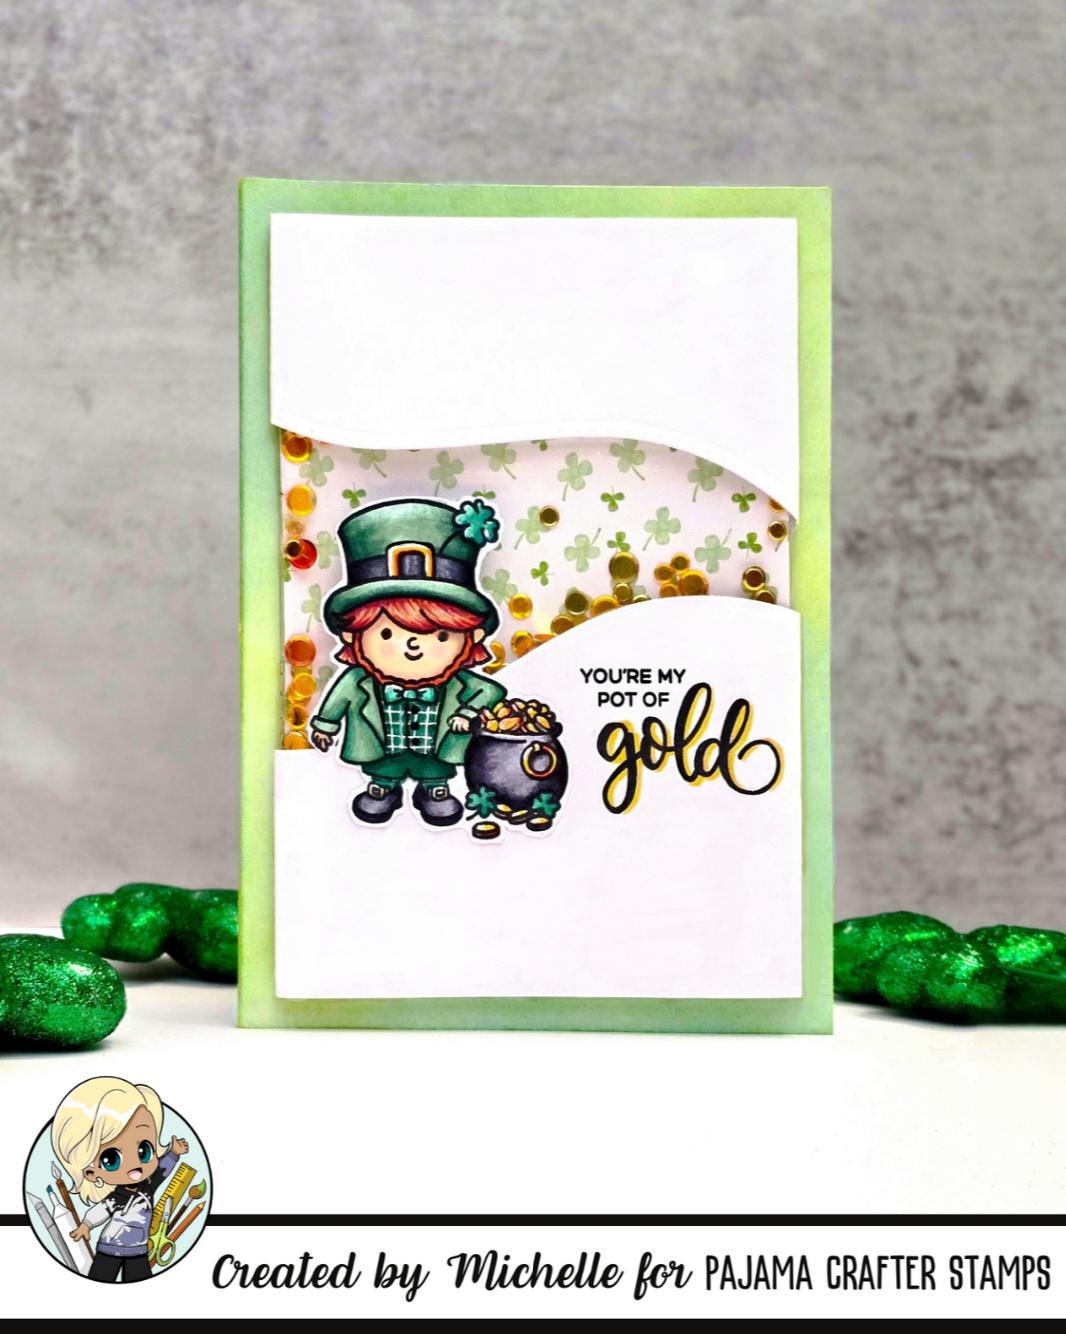
1. Color blended some greens on a 5×7 card panel with Distress Oxide


2. Stamped my leprechaun from the You’re My Pot of Gold Stamp Set, colored him with copics, fussy cut him out and set him aside
3. Scored a piece of cardstock so I would be able to fold the sides. The scores were at 5/8″ and 5″


4. Than ran it through my Big Shot with a stitched border die to create the wavy panels and cut off the end 5/8″ past the second score line
5. I picked a patterned paper from the Green Isle paper pad for my shaker background and grabbed my sequins and clear acetate


6. I wanted my shaker to be 4-1/4″ x 3″ so I cut the acetate 1″ larger 5-1/4″ x 4″
7. Scored, folded and cut the acetate and put the background paper in

8. Cut a piece of cardstock to 4-1/8″ x 6-1/8″ (This is what I wrapped my shaker and wavy panels around)
9. Stamped my sentiment on the bottom wavy panel and used copic Y35 to add a little accent shadow


10. I added foam tape to the background to add support and make the card panel even/level with the shaker
11. Assembled / glued the shaker panel to the front of my color blended card
Ta-da! Sounds simple, right? 😂

Fun Fact: I designed these stamps for Pajama Crafter Stamps!


