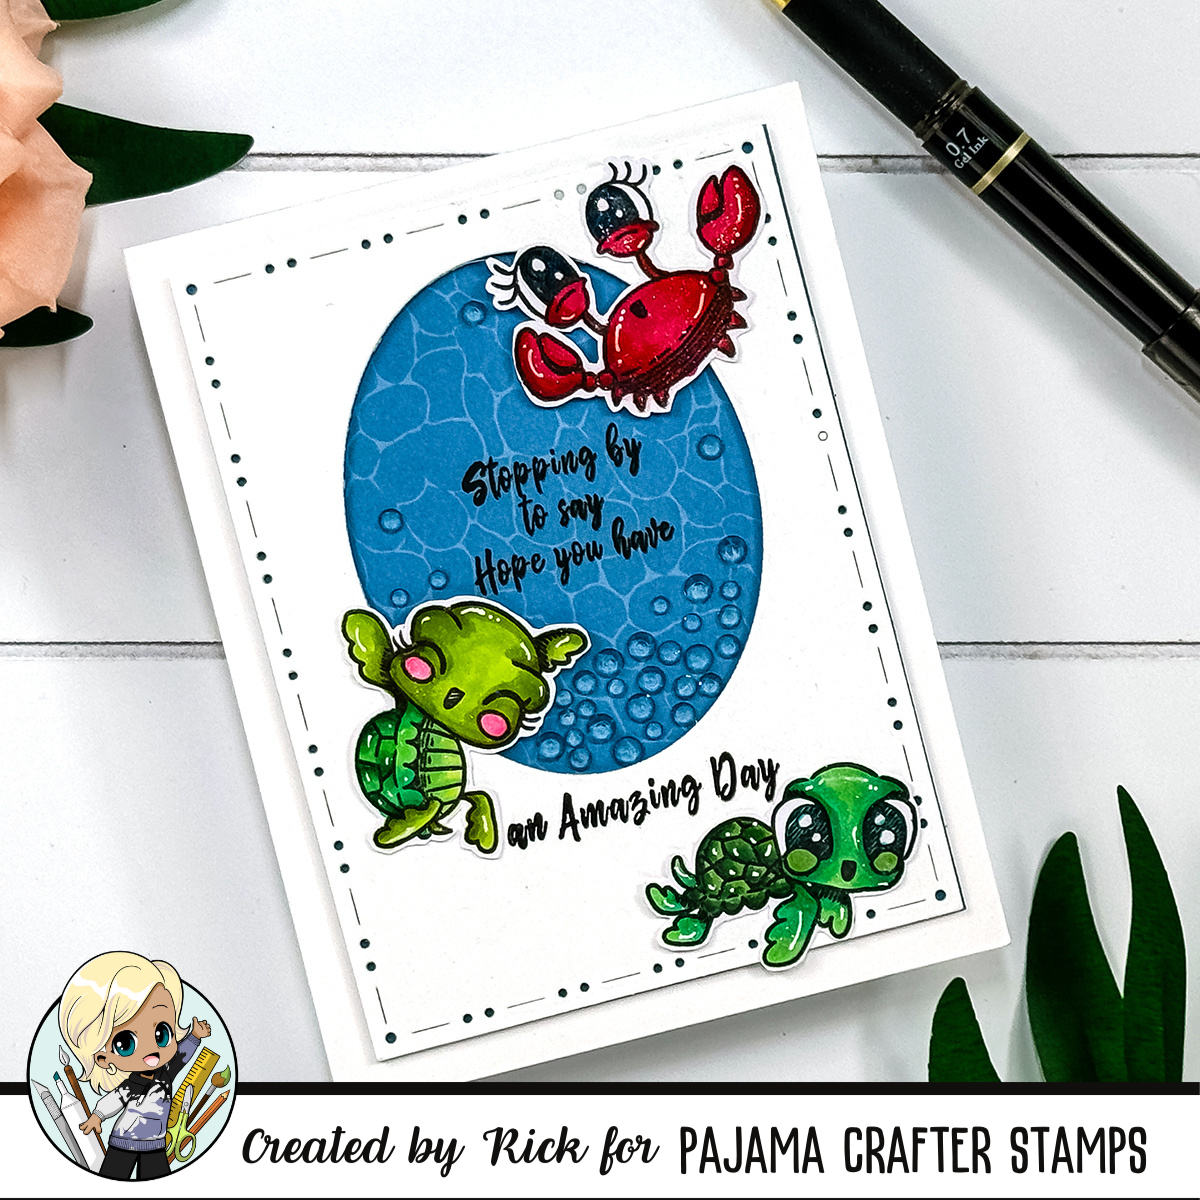
Hi card makers! Rick here, and I’m thrilled to bring you a charming and delightful project that’s been a real joy to create: the Faux Shaker Card! Today, we’re featuring the adorable Happy Beach Critters Stamp Set from Prickley Pear at Pajama Crafter Stamps. This project is perfect for adding a touch of whimsy and fun to your card-making repertoire. Plus, we’ve got a video tutorial to guide you through each step!

A Whimsical Card-Making Adventure
When I first saw the Happy Beach Critters Stamp Set, I knew it was destined to be the star of a fantastic card project. These playful turtles and the cheerful crab instantly captured my imagination. I wanted to create something that felt both festive and unique, so I decided to try my hand at a Faux Shaker Card.
Crafting the Background and Stamped Images
To start, I stamped the adorable turtles and crab onto some high-quality white cardstock (from my stash) using a reliable black ink (from my stash). After allowing the ink to dry completely, I colored in these cuties with vibrant markers (from my stash). There’s something so satisfying about watching these images come to life with a splash of color!

Next, I selected a piece of pattern paper from a paper pad that had sea life themed pattern paper in it (from my stash), cutting it to 3 3/4″ x 5″ to fit nicely onto my card base. To add a fun focal point, I used a rectangle die (from my stash) to cut out a window, and then an oval die (from my stash) to create an opening in the center of the rectangle.
Stamping Sentiments and Assembling the Card
For the sentiments, I used a trusty stamping tool (from my stash) and some black ink (from my stash) to stamp messages both inside and below the oval window. These sentiments added the perfect finishing touch to the background.

Once everything was stamped and colored, it was time to assemble the card. I layered the white window piece over the pattern paper with foam adhesive (from my stash) to give it a bit of dimension. Then, I attached this assembly to a top-folding A2 card base (from my stash). For securing the pieces in place, I used liquid glue (from my stash).
Adding the Faux Shaker Magic
Here’s where the fun begins: creating the faux shaker effect! Instead of using acetate and traditional shaker elements, I opted for some Girl’s Best Friend Rhinestones (Pajama Crafter Stamps). I carefully glued these around the bottom of the window and scattered a few inside the oval opening to mimic the look of a shaker card. This technique is not only simpler but also gives your card a beautiful sparkle without the mess.

Pro Tip: Mastering the Faux Shaker Effect
If you’re new to shaker cards or looking for a quicker alternative, the faux shaker technique is a fantastic choice. It’s easier to execute and still provides that eye-catching sparkle that makes your card stand out. Plus, it’s a great way to use up those rhinestones and gems you have lying around!
Watch the Tutorial
For a detailed walkthrough of the process, be sure to check out our video tutorial included in this blog post. It’s a great way to see each step in action and get additional tips and tricks.
Final Thoughts
I hope you enjoy creating this Faux Shaker Card as much as I did. The Happy Beach Critters Stamp Set from Prickley Pear is perfect for adding a touch of fun and whimsy to your card-making projects. Don’t forget to share your creations with us—I’d love to see how you put your unique spin on this design!

Happy crafting, and see you next time!
Affiliate Link Disclaimer: This post contains affiliate links. If you purchase items through these links, the designer may earn a small commission at no extra cost to you. Thank you for supporting the blog and our small business!
