Hello crafty friends, Rick back with you again this week for another creative project for Pajama Crafter Stamps. Today we are going to making a stunning Christmas Card with the Nativity Silhouette Dies and some ink blending. I also have a video tutorial for you showing you how to recreate today’s card.

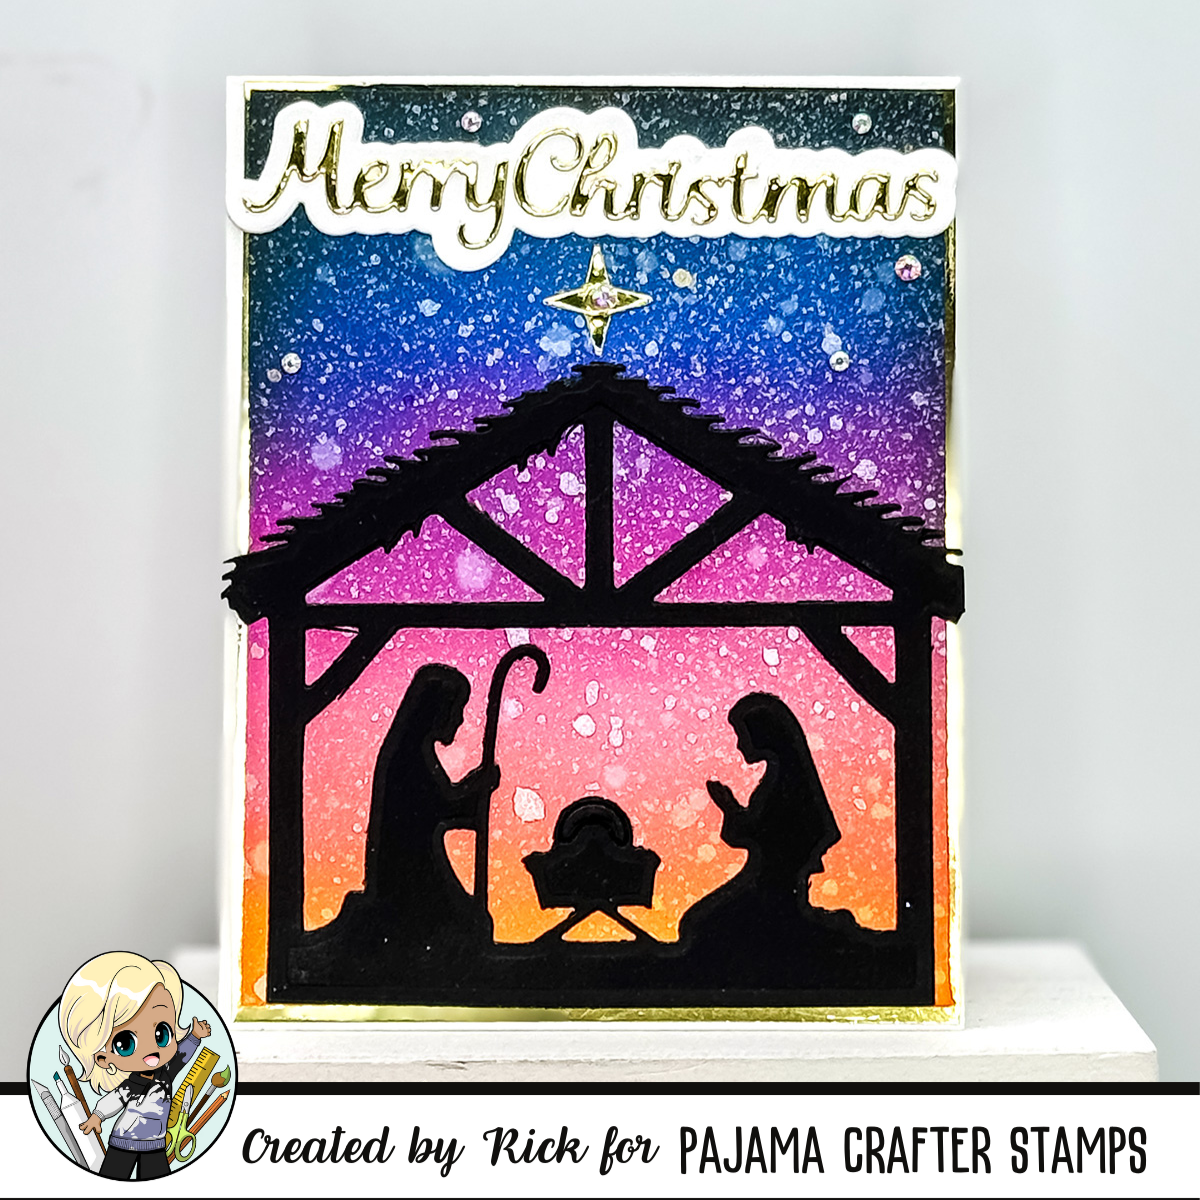
For the card I used a top folding A2 card base, used some metallic foiled cardstock, some bristol smooth cardstock, and some black cardstock. Just a few basic supplies that I am sure you have in your crafty space. I started out my ink blending by sunset background using oxide inks in an orange yellow shade, pink shade, red violet shade, dark blue shade, and black. You can use any ink for this if you are using dye ink I suggest using it with the Dye Ink Blending Solution for better results. I splattered on some water to and a little shimmer spray to the background and set it aside to dry.

While the background was drying I die cut all my parts and pieces. I cut the nativity scene from black cardstock using the Nativity Silhouette Dies. I cut the star from the Nativity Silhouette Dies from some gold foiled metallic cardstock. I also went ahead and picked out my sentiment for my card as well. I chose to use the Christmas Sentiments and Shadow Dies for this. I picked the Merry Christmas sentiment to use on this card. I cut the sentiment from the same gold foiled metallic cardstock and the shadow die from some white cardstock. I layered up the sentiment with the shadow die and set it aside. Once the background panel was dried I pulled it back in and attached it to a mat layer of gold foiled metallic cardstock cut 1/8″ larger than the card front.

I then attached the nativity silhouette to the card front using liquid glue. I then attached the star above the nativity. I then placed the matted card front onto the top folding A2 card base. I then added the sentiment over the star. To finish off the card I added one of my favorite rhinestones (the Fairy Dust Rhinestones) from Pajama Crafter Stamps to the card.
Video Tutorial:
Thanks for dropping by today I hope that you have a wonderful crafty days. Affiliate links used where possible at no additional cost to you. Have a fabulous crafty day and I hope that this video and blog post helps you create a few stunning Christmas cards this year that’s super easy and fast to create.