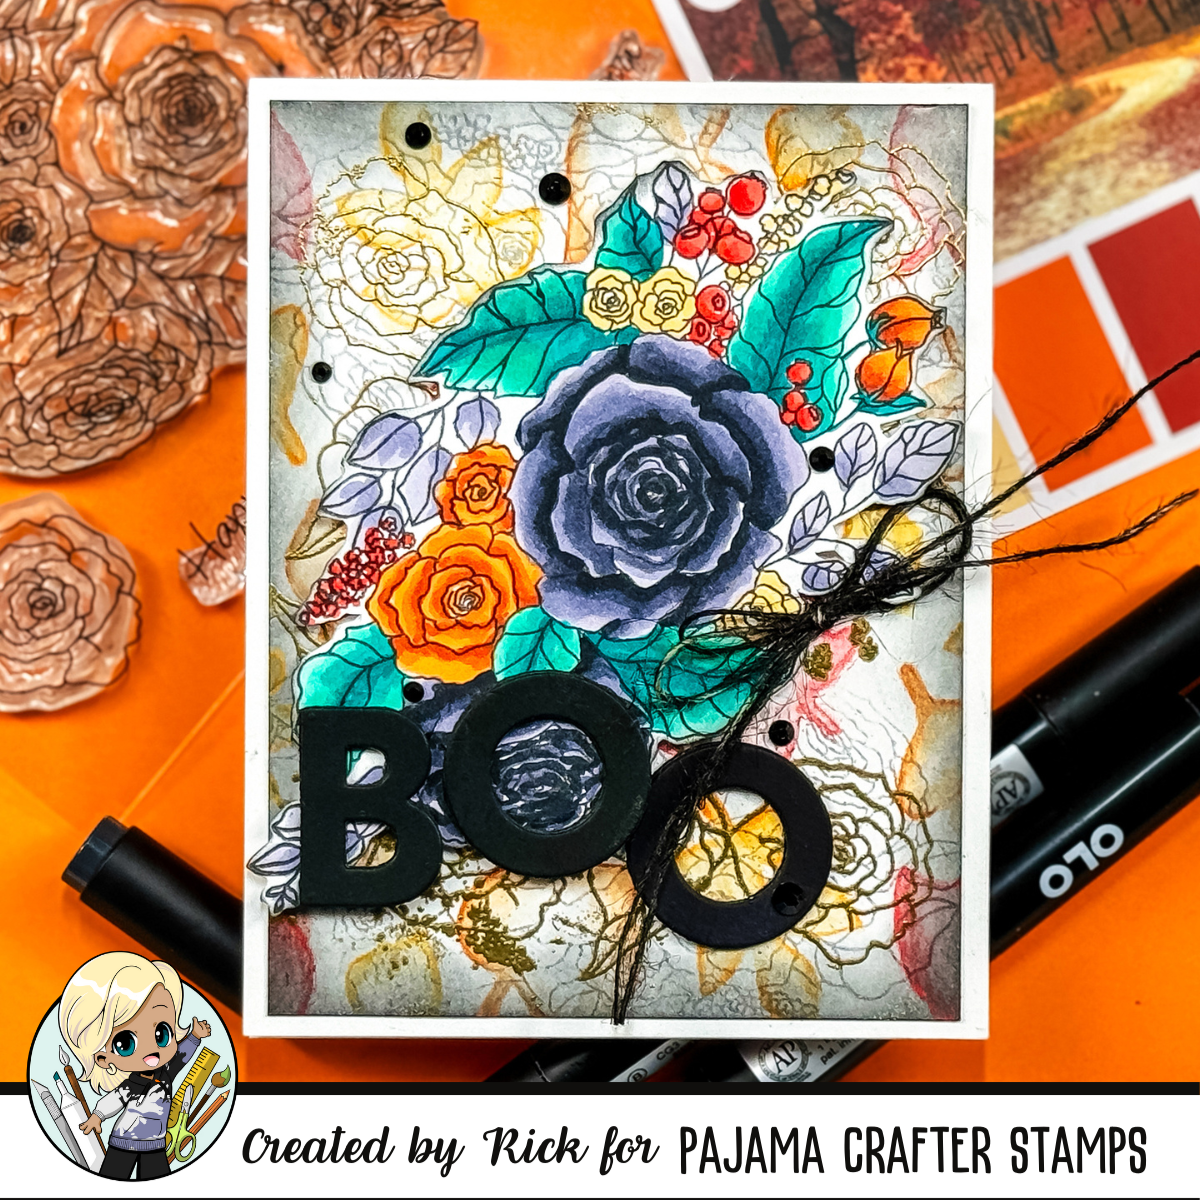
Hello, crafty friends! Rick here, excited to bring you another fun and unique card for Pajama Crafter Stamp! Today, I’m diving into a vintage mixed media project, blending the unexpected combination of florals and Halloween elements. Sometimes, it’s all about looking at your supplies in a new way, and I think today’s card does just that.

Mixing Vintage Florals with Halloween Vibes
Now, I know florals might not be the first thing that comes to mind when you’re thinking Halloween, but this project shows just how fun it can be to mix different styles and make them work together! Using the Lovely Bouquet Stamp Set from Pajama Crafter Stamps, I wanted to create a card that feels both spooky and elegant, with a vintage twist.
Creating the Background
To start, I stamped the large floral image from the Lovely Bouquet Stamp Set on a piece of mixed media smooth white cardstock. I love how crisp the image turns out when using a gray Archival Ink—it has a soft, shadowy tone that sets the perfect mood. I stamped the image at both the top and bottom of the cardstock to frame the card design.
Next, I pulled out a leaf stencil (from my stash) to add some dimension to the background. Using four shades of Distress Watercolor Pencils—Rusty Hinge, Wild Honey, Crackling Campfire, and Spiced Marmalade—I traced the leaves and then used a damp paintbrush to blend the colors and soften the lines. This is such a great way to bring out texture without overwhelming the design.
Pro Tip: When working with water-based pencils, be careful not to overwork the paper. A little water goes a long way in moving the pigment. Less is often more!

Embossing for a Touch of Elegance
Once the background was dry, I prepped the cardstock with my powder tool (from my stash) to keep the embossing powder only where I wanted it. I stamped two of the smaller floral images from the Lovely Bouquet Stamp Set using Versamark Ink and heat-embossed them in a gorgeous Gold Embossing Powder. This added the perfect touch of elegance and really tied the vintage theme together.
Coloring the Focal Floral Image
For the main focal point, I stamped the large floral bouquet again, this time in a Black Alcohol Marker Friendly ink and colored it with my alcohol markers. I wanted to play with a non-traditional color palette for Halloween, so I used cool gray markers to color two of the cabbage roses to give them a more gothic, blackened look. The other flowers were colored in shades of orange and yellow, perfect for the spooky theme. The leaves got a rich blue-green, and I went with bright red berries for a little pop of color.
After coloring, I fussy cut the image using my trusty scissors (from my stash).
Pro Tip: When fussy cutting detailed images, turning the paper rather than your scissors gives you smoother lines and more control over the cut!

Putting it All Together
Once I had all the pieces ready, I mounted the card front onto a top-folding A2 card base. I then used 2mm foam tape (from my stash) to pop up the fussy-cut floral image, giving the card some lovely dimension.
I wanted the sentiment to be bold but simple, so I die-cut the word “BOO” from black cardstock and added it to the bottom of the card. To finish it off, I took some natural burlap twine (from my stash), colored it black with a marker, tied it into a double bow, and added it as the final touch.
Lastly, I sprinkled a few coal-colored rhinestones (from Pajama Crafter Stamps) around the card for a bit of sparkle and that extra spooky flair.
Final Thoughts
This project was such a blast to create, and I hope it inspires you to look at your supplies in a new light! By combining vintage floral elements with Halloween colors and textures, you can easily achieve that “sweet but spooky” vibe. I’d love to see how you stretch your own supplies to create something unexpected this Halloween season!
Thanks for crafting with me today!
Affiliate Disclaimer: This post contains affiliate links. If you make a purchase through one of these links, I may receive a small commission at no extra cost to you. Thank you for supporting the blog!
