One of the best ways to stretch your cardmaking supplies is by mixing and matching stamp sets, dies, papers, and embellishments from your crafty stash. Combining products from different collections can create unique handmade cards while helping you get more value from the supplies you already own. Today’s inspirational card features products from Pajama Crafter Stamps and showcases how easy it is to create a powerful encouragement card with a few coordinating elements.

Create a Strong Card Foundation
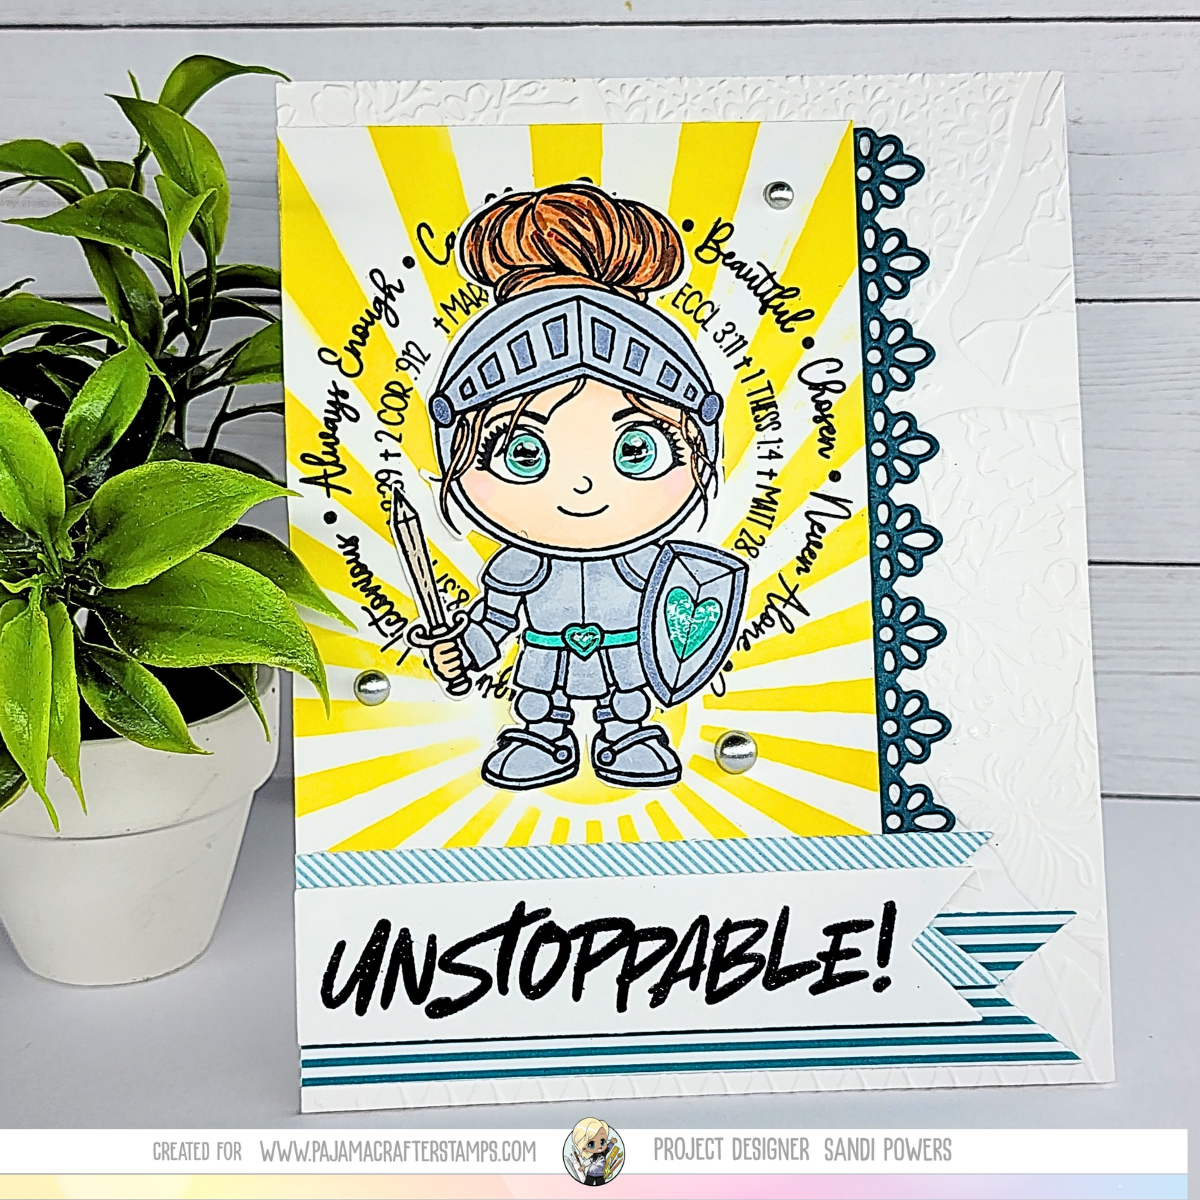
Every great handmade card starts with a solid foundation. For this encouragement card, I began with an A2 card base and layered on an embossed background panel. One of my favorite cardmaking tips is to choose an embossing folder or stencil design that complements the focal image. Adding texture to the background creates visual interest without overwhelming the design. The embossed panel provides the perfect backdrop for the bold focal image while adding dimension and depth to the finished card.
Build the Focal Panel

To create the focal point, I started by ink blending with the Sunburst Stencil. The radiating design adds energy and movement, making it the perfect choice for a motivational card.
Next, I stamped the background sentiment from the You Are Stamp Set using crisp black ink to create a strong visual anchor. The knight image from the Unstoppable Stamp Set was stamped, colored with alcohol markers, and carefully fussy cut before being adhered to the focal panel. The combination of the bold sentiment and courageous knight creates a powerful reminder that strength and determination can overcome any challenge.
Add a Bold Encouragement Sentiment

A meaningful sentiment can elevate any handmade card. I stamped and heat embossed the sentiment from the Unstoppable Stamp Set to make it stand out against the background. To finish the sentiment strip, I used the Banner Die Set—an absolute essential in my craft room. Banner dies instantly give sentiments a polished, professional look while making them easy to incorporate into any card design. To tie the design together, I layered in patterned papers from the Savanna Neutrals Paper Pack. The warm, neutral tones complement both the knight image and sentiment while adding additional texture and visual interest.
Finish with Embellishments

The finishing details help bring a card to life. For this project, I added a piece of paper lace and silver embellishments to create extra dimension and elegance. I also added a glossy effect to the knight’s eyes and shield. Small embellishments can have a big impact by drawing the eye across the card and adding those final touches that make a handmade card feel special.
Supplies Used
Affiliate Disclosure: The links above are affiliate links. When you shop using an affiliate link, I earn a small commission at no additional cost to you. Thank you for supporting small business and the designers who create inspirational projects!
Bring It All Together
One of the greatest joys of cardmaking is discovering new ways to use supplies you already own. Mixing and matching stamp sets, dies, patterned papers, stencils, and embellishments opens up endless creative possibilities. Don’t limit yourself to the sentiments included in a single stamp set. Pair images and greetings from different collections, pull out forgotten embellishments, and experiment with unexpected combinations. You’ll be amazed at the fresh, unique designs you can create.
The next time you’re feeling stuck creatively, challenge yourself to combine products from different sets. You may just discover your next favorite card design!
Stay sparkly! – Sandi @sandi_powers_creates
Leave a Reply