Hello and welcome to the Pajama Crafter Stamps blog; it’s Rick back with you today and I am very excited to be sharing a fun little card with a circle window in the center. This is an easy card design to place your focal image front and center to draw attention to it. You can step this card up or step it down depending on how you want to create it.

Spring Is in Full Bloom Circle Window Card:
Gather Your Supplies:
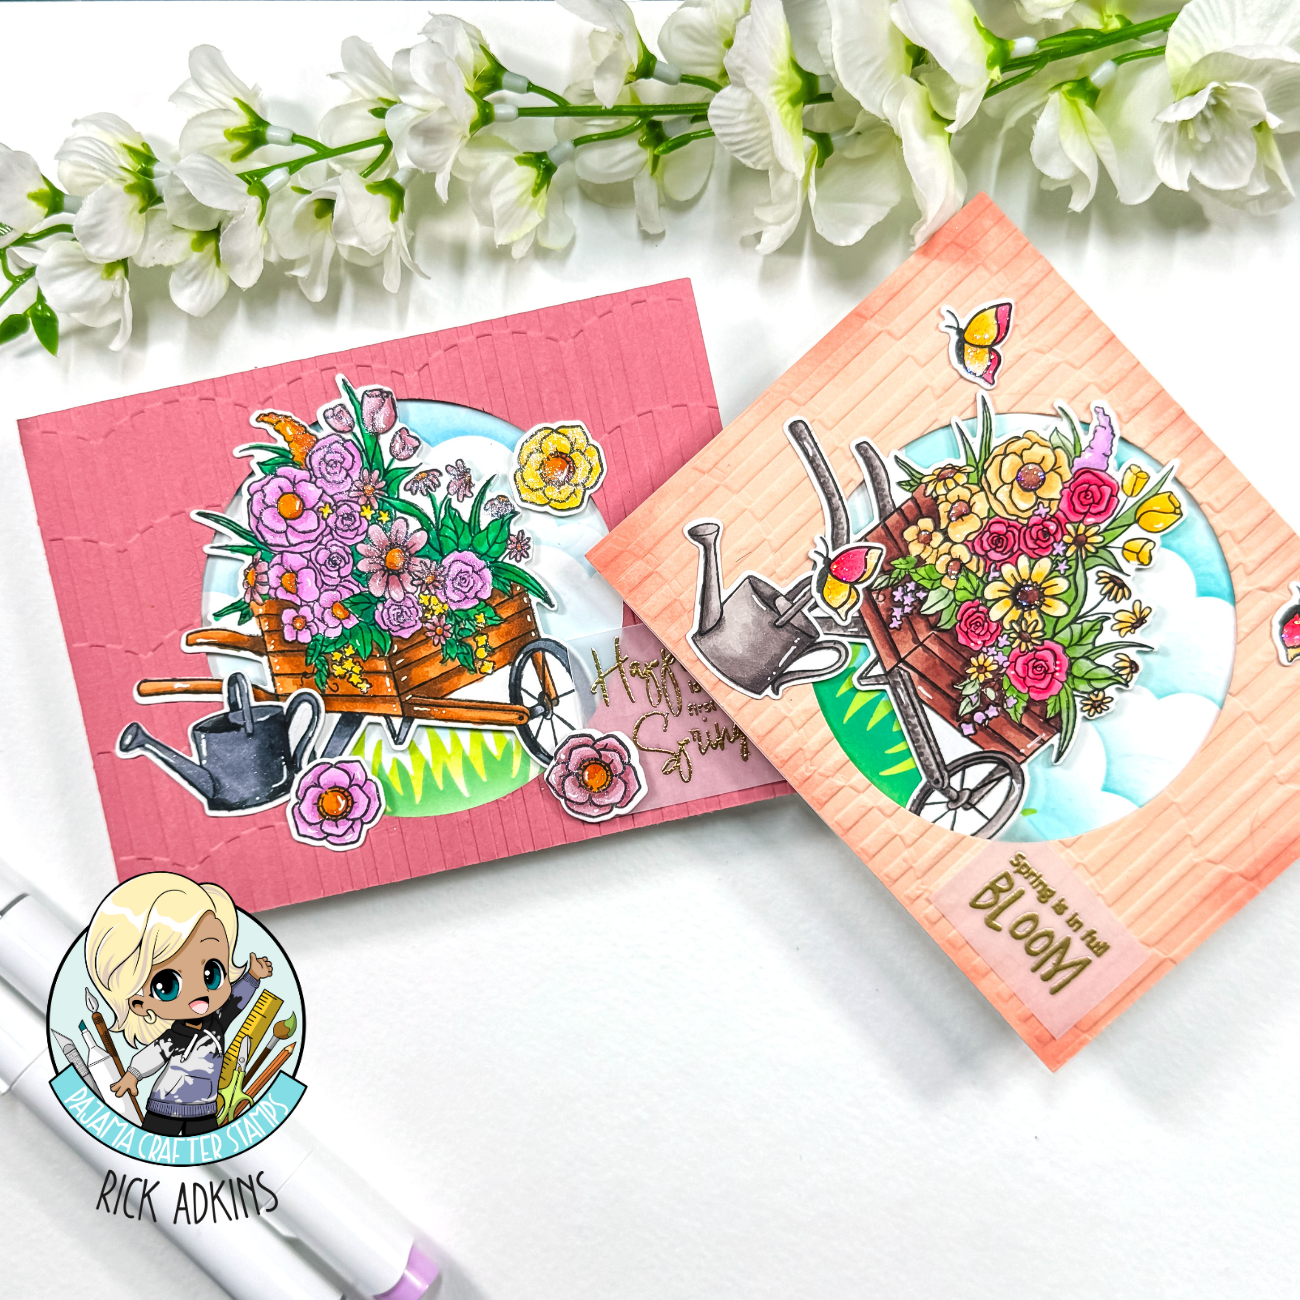
My Card today features the In Full Bloom Bundle (from Pajama Crafter Stamps). As well as an Embossing Folder. I colored the wheelbarrow and the butterflies with my alcohol Markers. You will also need a little Vellum Cardstock that you can heat emboss on, and cardstock for your card base and card front. I picked a different color cardstock for each of my card fronts that would tie into the colors of my coloring.

Creating a Window Card:
When you create a window card like the one I am sharing today you will need to cut your window opening first before you dry emboss it. I cut a piece of colored cardstocks to 4 1/4″ x 5 1/2″ to fit on the entire front of the card. To cut the opening roughly in the center of my card front I used Circles Dies (3 3/8″ circle die). I then took the same piece of cardstock and used the Embossing Folder to dry emboss the panel.

Next I cut a piece of Neenah Classic Crest Solar White Cardstock to 4 1/4″ x 5 1/2″ and used a Cloud Stencil and a Grass Stencil to create the scene for my card. I only did the ink blending for the window just slightly larger than the circle opening. I used Twisted Citron Distress Oxide Ink and Rustic Wilderness Distress Oxide Ink for the grass layers and Tumbled Glass Distress Oxide Ink for the clouds.

Once I had the panels completed I placed the scene panel onto my card base with a little liquid adhesive. Then I centered the embossed window panel over the scene using small pieces of Foam Tape. This allowed my panel to pop up slightly and would allow me to be able to place the wheelbarrow onto the card so that it looks as if it was being rolled into the scene; once I was ready for that step.

At this point I could move onto the coloring process. I had stamped out my wheelbarrow, watering can, and three of the butterfly (3 times) from the In Full Bloom Stamp Set with Memento Tuxedo Black Ink onto some alcohol marker friendly cardstock. I then colored the images with my Alcohol Markers. Once the color was completed I used the In Full Bloom Dies to cut out each of the images.
Video Tutorial:
If you have problems viewing the video on the blog click here to watch it on our YouTube Channel.
After the coloring was completed I added my detail work with my Sakura White Bold Gelly Roll Pen and then added a little sparkle to the butterflies and the flowers with my Stardust Stickles. White this was drying I prepped my small piece of Vellum Cardstock with my CottonTail Embossing Powder Tool. I heat embossed my sentiment with Gold mbossing Powder. After the heat embossing had completely cooled I attached the sentiment to the card front by placing small dots of adhesive behind each of the letters of the sentiment.
To finish off the card i added a little Foam Tape behind the wheelbarrow, where it would need the extra support, sitting inside the window and liquid glue on the rest. I did the same thing with the watering can as well. I then attached my three butterflies/flowers to act as an embellishment on my cards. Just a little side note here if you wanted to you could easily change the window card into a fun little shaker card. Thanks for dropping by today I hope that you have a fabulous day and I will see you again real soon. Happy Crafting!
Supplies Used:

Affiliate Disclaimer:
Hey there, fabulous crafters! Just a heads-up: Some of the links you find on this blog are affiliate links. This means that if you click on them and make a purchase, I might earn a small commission at no additional cost to you.
I want to assure you that I only suggest products that I truly believe in and personally use. Your support through these affiliate links enables me to maintain this blog, allowing me to continue sharing valuable tips and creative inspiration with all of you.
If you have any questions about any of the products mentioned, don’t hesitate to reach out. I’m always here to assist you!
Thank you for being a part of this amazing crafting community!
Leave a Reply